
The Astonishing and Delightful Pink Ombré Pavlova Cloud Cake
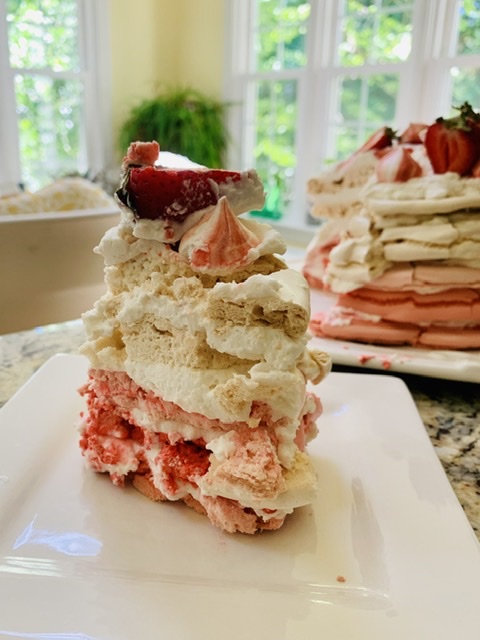
I was really excited to learn how to make this 5 -Layer Pink Ombré Pavlova Cloud Cake. If you have never tasted pavlova, you are in for a treat! Imagine eating a light, crunchy, sweet cloud that simply melts in your mouth. Then stack it high. That’s what I think this pavlova cloud cake tastes like!
In the spring of this year, I joined this fabulous group of bakers on Facebook called The Great British Baking Bake Along created by Laura Sampson. I am a big fan of that baking show and thought it would be fun to learn new ideas from them. Little did I know that this group of wonderful people from all over the world would become my source of inspiration and comfort when my family and I were self isolating due to the pandemic. These group of bakers would encourage, give feedback and generally support one another by sharing pictures of their work, recipes, good tips and techniques, and were unstinting with their praise and encouragement. Laura together with Susan, our site moderator, would post a weekly “bake-along” challenge. Due to that prompt, I have probably tried (and succeeded!) to make numerous baked items that were probably out of my comfort zone. I am a much more confident baker today because of them.
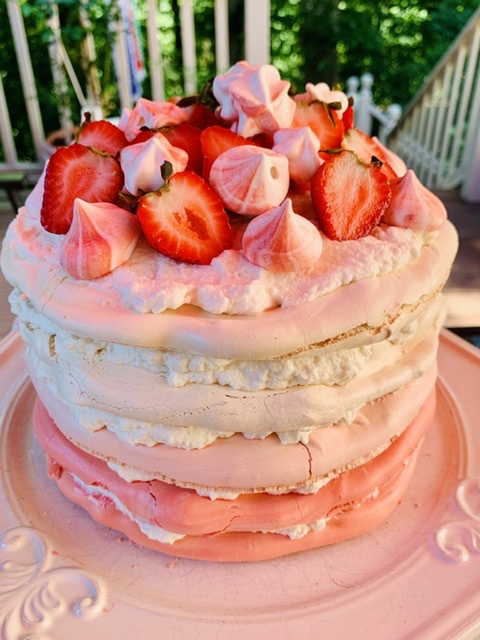
This gorgeous and delicious cake is a wonderful concoction made up of baked whipped egg whites and sugar. Loaded with oodles of fresh whipped cream and topped with fresh strawberries and meringue kisses. This pavlova makes me think of sweet happy summer days…
Making the Pavlova Cloud Cake
The process of making this is really broken into 2 parts. First, we make the meringue discs and kisses for the cake. And then, we assemble the whole thing together and decorate. Since pavlova requires precision in the ingredients, I will be listing both metrics and imperial measurements for easy usage.
Ingredients
These are the items you will need to make the Meringue:
1 2/3 cup (370g) fine granulated sugar
6 large (180g) egg whites
3 tsp Strawberry Essence for Icing
Red Food Colour Gel
Prepare these ingredients for assembling and decorating the pavlova:
2½ cup (600ml) heavy cream
½ cup (75g) icing sugar
1 tsp Vanilla Extract
2 tsp Strawberry Essence for Icing
½ cup Fresh strawberries, washed and sliced in half
You have probably heard that handling meringue is a finicky thing. It is important to not have any grease on any of the surface of the items that we will be using to whip up the eggs whites. To do this, simply wipe down your bowl and attachements with a paper towel soaked with vinegar. This will get rid of any grease that will stop your eggs from whipping up.
Preparing to make meringue
To begin, preheat the oven to 400ºF (200ºC). Spread the fine granulated sugar evenly on an baking pan lined with parchment paper and heat in oven for 5 minutes.
In the meantime, beat egg whites on medium speed for about 2 minutes, or until soft peaks form.
While the mixer is still running, remove sugar from oven and gradually add the warm granulated sugar to egg whites. Continue and beat mixture on high for 5-10 minutes, or until you can see firm peaks forming. The bowl should be cool to the touch. Add in the strawberry essence and mix well.

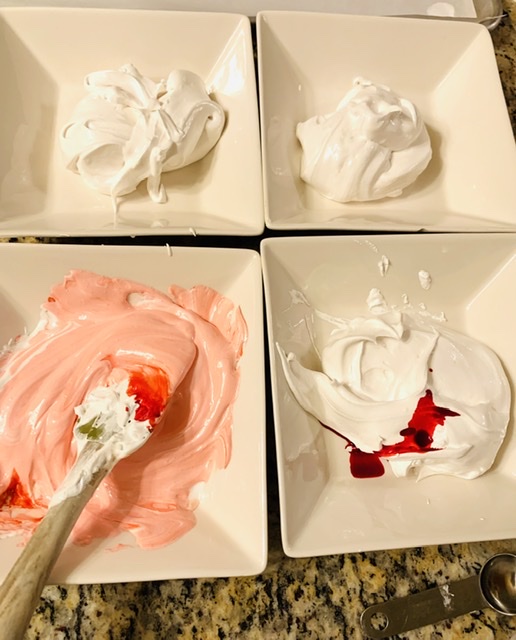
Reduce oven to 225ºF (100ºC) and divide the whipped meringue into 6 bowls. Add drops of Food Colour Gel to 4 bowls to reach desired red shades and leave 2 bowls white.
Prepare the 5 parchment paper with 7-8″ (18-20 cm) diameter circles traced onto a paper. Then, turn the paper over and transfer meringue evenly to the circles.
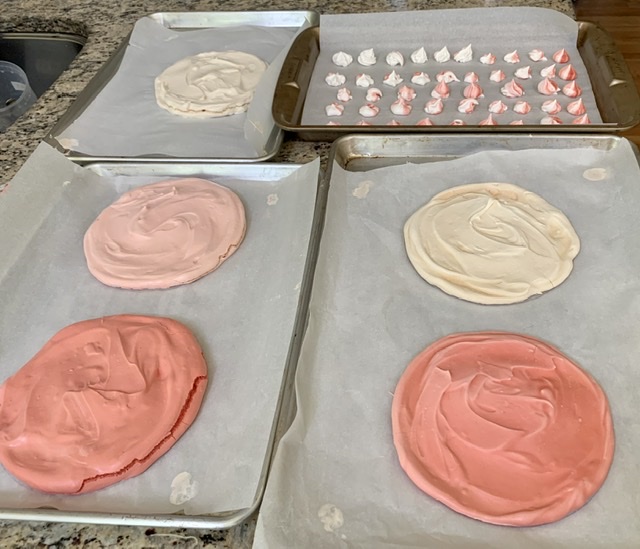
When done, pop the trays into the oven and bake for 40-50 minutes, or until meringue has dried. You will know it is ready when it lifts easily from the paper. Repeat the same process with the other 4 meringue layers.

Using the remaining meringue, paint stripes of red food colour gel into a piping bag (or zip lock bag). Transfer the meringue into the bag and pipe meringue kisses onto a lined tray and bake for 30 minutes. Remove and cool.
Assembling Ombré Pavlova Cloud Cake
Start assembling the pavlova when ready to serve.
Whip the heavy cream, icing sugar, Vanilla extract and Strawberry essence until medium peaks form. Scoop and add to layer in between the meringue discs.

Finally, add a layer to the top and complete the decoration with sliced fresh strawberries and meringue kisses.

And ta-da! You have just completed your gorgeous Pink Ombré Pavlova Cloud Cake!
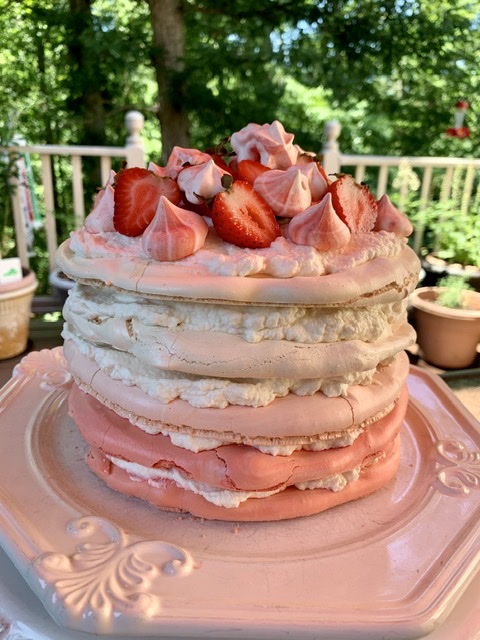
Slicing into the cake is like cutting into light crunchy caramelized sugar.

Having a slice of cloud cake is like eating a piece of heaven in your mouth! Bon Appetit!
Postscript:
I am happy to share that my Pavlova cake entry was selected as the “Star”bucks Baker for the Meringue challenge with my baking group. Besides winning a Starbuck coffee gift card and the coveted Bake-Along Decal sticker, the biggest honor was the bragging rights. 😜❤😂
Pink Ombré Pavlova Cloud Cake
Ingredients
- 1⅔ cups Fine Granulated Sugar
- 6 Large Egg Whites
- 3 tsp Strawberry Essence for Meringue
- Red Food Coloring
- 2½ cup Heavy Cream
- ½ cup Icing Sugar
- 1 tsp Vanilla Bean Extract
- 2 tsp Strawberry Essence for Filling
- ½ cup Fresh Strawberries, halved
Instructions
- Preheat the oven to 400ºF (200ºC). Spread the fine granulated sugar evenly on an baking pan lined with parchment paper and heat in oven for 5 minutes.
- In the meantime, beat egg whites on medium speed for about 2 minutes, or until soft peaks form.
- While the mixer is still running, remove sugar from oven and gradually add the warm granulated sugar to egg whites. Continue and beat mixture on high for 5-10 minutes, or until you can see firm peaks forming. The bowl of should be cool to the touch. Add in the strawberry essence and mix well.
- Reduce oven to 225ºF (100ºC) and divide the whipped meringue into 6 bowls. Add drops of Food Colour Gel to 4 bowls to reach desired red shades and leave 2 bowls white.
- Prepare the 5 parchment paper with 7-8" (18-20 cm) diameter circles traced onto a paper. Then, turn the paper over and transfer meringue evenly to the circles.
- When done, pop the trays into the oven and bake for 40-50 minutes, or until meringue has dried. You will know it is ready when it lifts easily from the paper. Repeat the same process with thew other 4 meringue layers.
- Using the remaining meringue, paint stripes of red food colour gel into a piping bag (or zip lock bag). Transfer the meringue into the bag and pipe meringue kisses onto a lined tray and bake for 30 minutes. Remove and cool.
- Start assembling the pavlova when ready to serve. Whip the heavy cream, icing sugar, Vanilla extract and Strawberry essence until medium peaks form. Scoop and add to layer in between the meringue discs.
- Finally, add a layer to the top and complete the decoration with sliced fresh strawberries and meringue kisses.
- And ta-da! You have just completed your gorgeous Pink Ombré Pavlova Cloud Cake!
Notes
The recipe is adapted from this website https://queen.com.au/recipes/pretty-pink-pavlova/
More Fab Food Ideas:
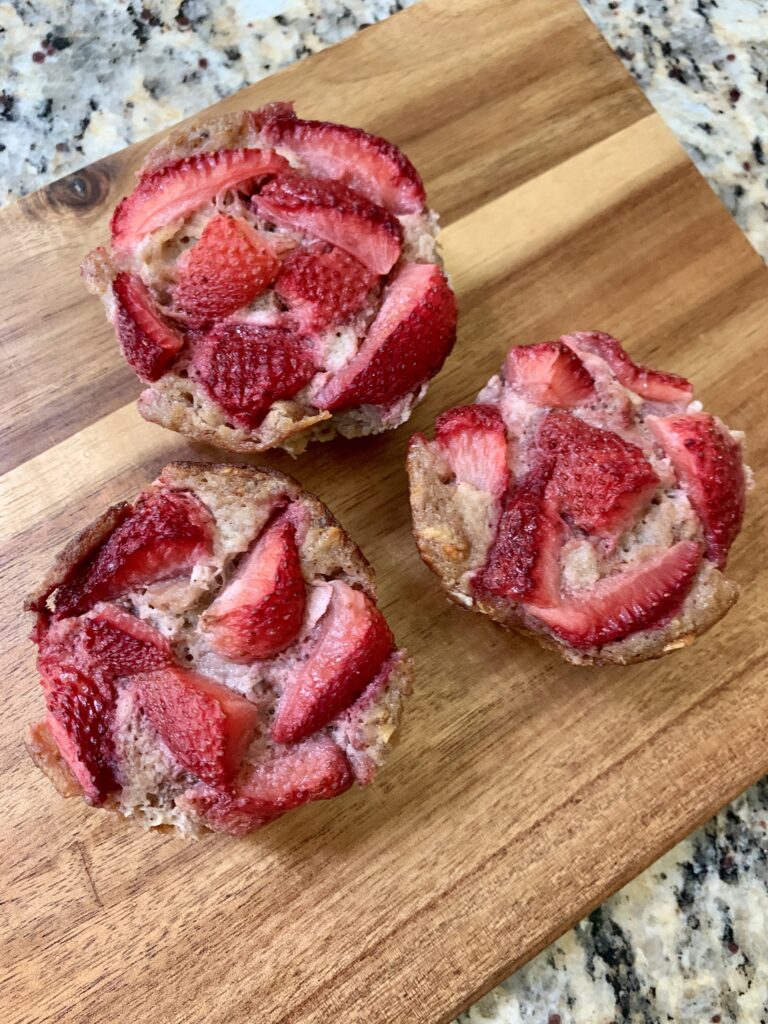
If you love strawberries, please try out this fabulous => Strawberry Craisin Oatmeal Cup. It’s delicious, healthy and bakes up in under an hour.
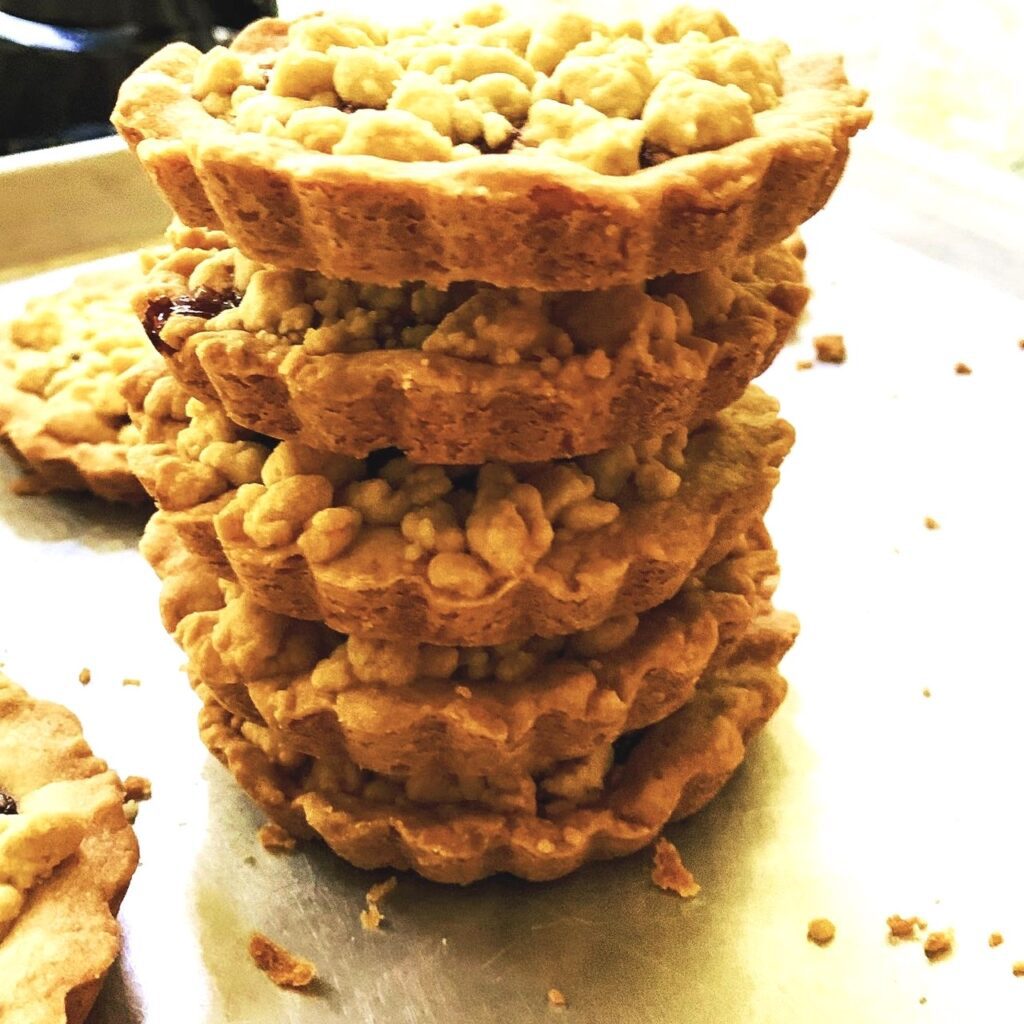
If you are in the mood for something sweet, try out my version of Costco’s cult favorite Raspberries Crumble Cookies at Home
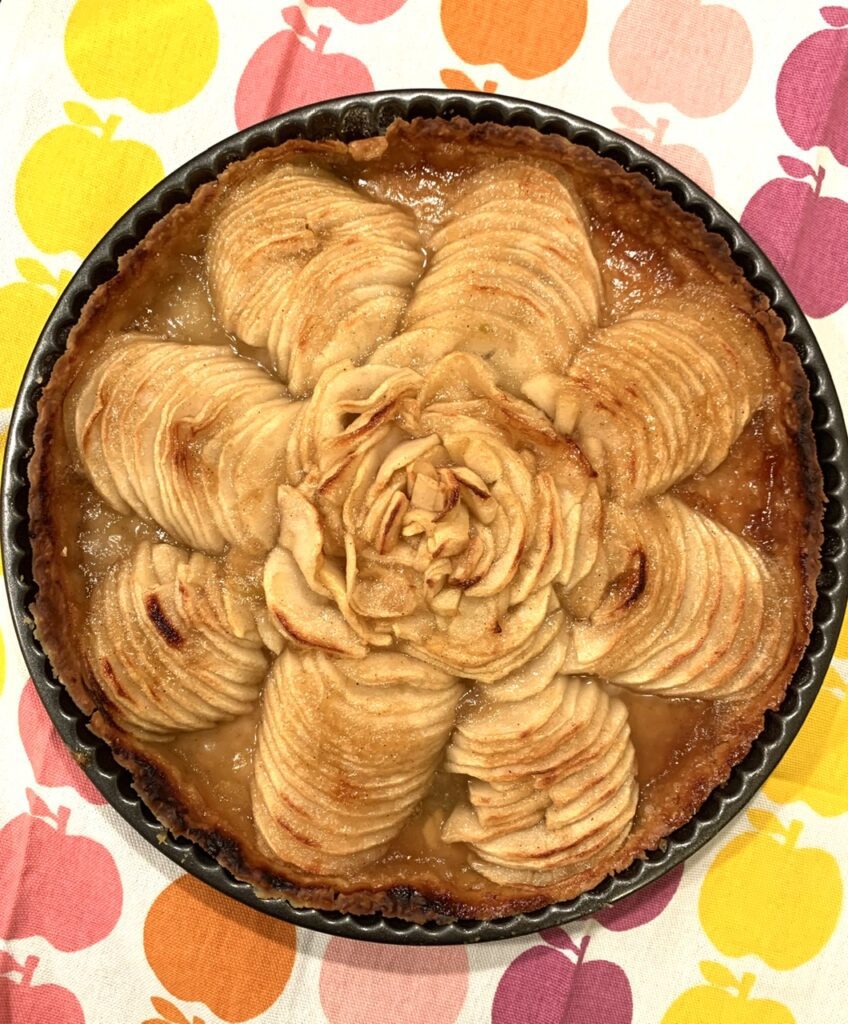
Have you tried this French Apple Tart? I learned new technique on how to prepare the apples during the Sara Moulton’s baking challenge this summer. It makes it really easy to slice the apple and shape the tart. Read it here =>Fun French Apple Tart – Taking up Sara Moulton’s Challenge!
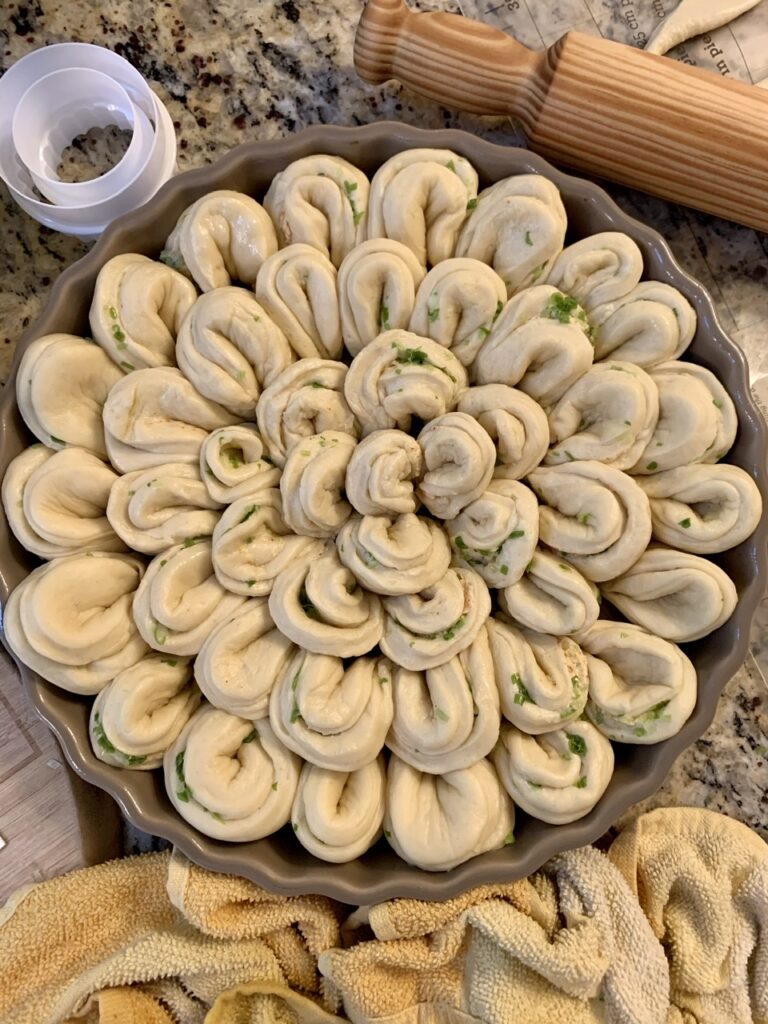
Have you seen this unusual pull-apart garlic bread? It looks like a chrysanthemum and tastes amazing. Here’s the post and recipe on how to put it together =>Beautiful Pull-Apart Flower Petals Garlic Bread
This looks so beautiful! A question, though – how long ahead can these be baked? I realize assemblage should be immediately before serving, but I’d love to do the leg work a few days ahead, if possible.
Hi Jacquelyn – thanks for visiting! Optimally, I would bake this a day or 2 ahead of assembling to retain its freshness and crunch! If stored correctly, I think we can push it to a week, not more. Happy baking! – Jessica